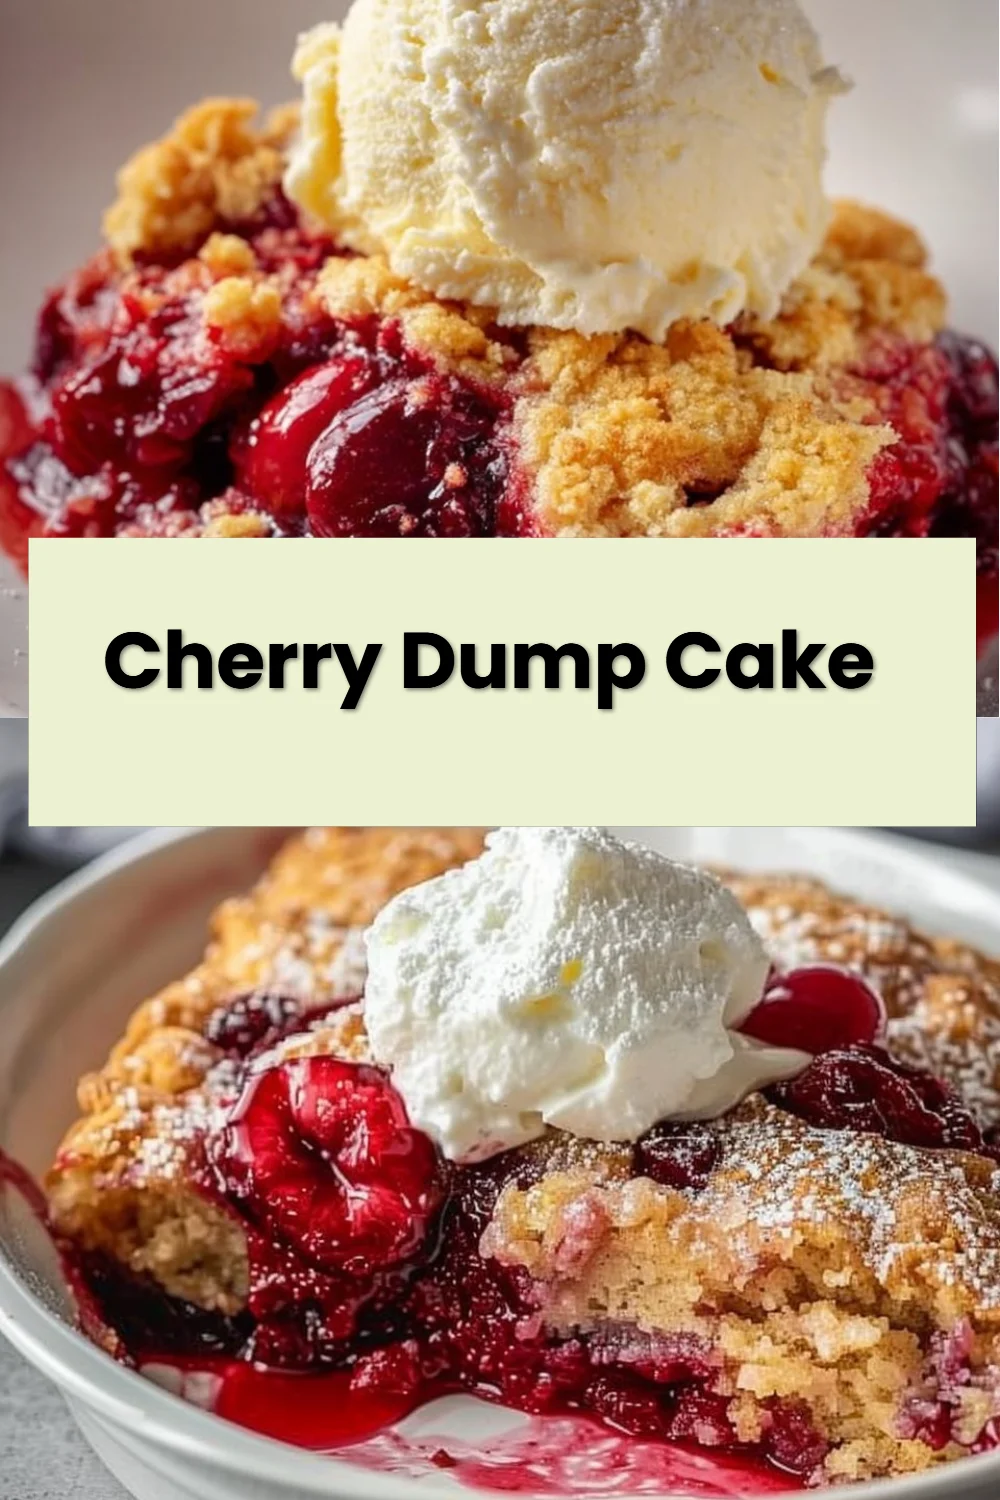
Cherry Dump Cake Recipe is a wonderfully simple dessert that turns pantry staples into a warm, comforting treat with minimal effort. If you’re planning a quick family dinner and want an easy dessert to follow, this 30-minute chicken recipe pairs well with a straightforward sweet finish.
Cherry Dump Cake Recipe
Why make this Cherry Dump Cake Recipe
There are plenty of reasons to keep this Cherry Dump Cake Recipe in your regular rotation. First, it’s fast: assembly takes minutes, and the oven does the rest. That makes it ideal for weeknights, potlucks, or last-minute guests.
Second, it uses mostly shelf-stable ingredients—canned pie filling and boxed cake mix—so you can make it even when your pantry is the star of the show. That pantry-first approach means fewer trips to the store and less prep time without sacrificing flavor.
Third, the texture contrast is excellent: a gooey, fruit-forward filling topped by a buttery, crisp cake crust. That balance makes it satisfying to a wide range of tastes, from kids to adults.
Finally, it’s forgiving. If you want to tweak sweetness, add nuts, or swap a few items for allergies or dietary needs, the recipe adapts well. It’s a dependable dessert that still feels a little celebratory.
How to make Cherry Dump Cake
This Cherry Dump Cake Recipe is named for exactly what you do—you "dump" layers into a baking dish, then bake. Below is a clear walkthrough to help you get it right, along with small adjustments to improve texture and flavor.
Start by preheating the oven and prepping your dish. Use a 9×13-inch baking dish and lightly grease it to prevent sticking and make serving easier.
Next, spread the cherry pie filling evenly across the bottom of the dish. Some people prefer to warm the filling slightly before pouring so it’s more spreadable; that’s optional.
Sprinkle the dry yellow cake mix over the cherry layer without stirring. The point is to keep the filling and dry mix as separate layers so the top can become that golden, crunchy crust while the fruit remains gooey.
Pour melted butter evenly over the cake mix. The butter will seep down as it bakes, forming a crispy topping and a moist crumb where it meets the filling. If you want a little extra crunch, sprinkle chopped nuts on top before baking.
Bake until the top is golden and you see bubbling fruit at the edges. Let the pan cool for 10–15 minutes so the filling sets a bit and slices hold together better.
If you like a little extra brightness, add a splash of vanilla to the melted butter before pouring. Small touches like this can lift the flavors without changing the simple method.
Ingredients :
- 1 can (21 oz) cherry pie filling
- 1 box (15.25 oz) yellow cake mix
- 1 cup (2 sticks) unsalted butter, melted
- ½ cup chopped walnuts or pecans
- 1 teaspoon vanilla extract
Ingredient notes and safe substitutions:
- If you need a nut-free version, omit the walnuts or pecans and use toasted oats or extra butter for texture instead.
- For a dairy-free or vegan option, replace the butter with 1 cup melted coconut oil or a vegan butter substitute. The top will crisp differently but still be tasty.
- If you prefer less sugar, look for reduced-sugar pie filling or a lighter cake mix. You can also use a gluten-free yellow cake mix if you need to avoid gluten.
- Vanilla extract adds depth; it’s optional but recommended. If you don’t have vanilla, a small pinch of almond extract can be interesting with cherry—use sparingly.
Directions :
- Preheat your oven to 350°F (175°C). Lightly grease a 9×13-inch baking dish to prevent sticking and ensure easy serving after baking.
- Dump the entire can of cherry pie filling into the prepared baking dish, spreading it evenly to cover the base completely.
- Evenly sprinkle the dry yellow cake mix over the cherry filling without stirring to keep the layers distinct for a perfect texture contrast.
- Melt the butter and pour it carefully over the top of the cake mix in an even layer. The butter will soak down and create a crispy, golden crust while baking.
- If desired, sprinkle chopped nuts such as walnuts or pecans evenly on top before placing the dish in the oven.
- Bake for 45 to 50 minutes or until the top is golden and bubbly around the edges. Let it cool slightly for 10-15 minutes before serving to allow the filling to set.
Pro Tips for Success Cherry Dump Cake Recipe
- Use room-temperature, fully melted butter poured slowly and evenly. This helps the butter distribute across the dry mix so the top browns uniformly.
- Don’t stir the layers. That distinct separation is what creates the contrast between a crispy top and moist fruit beneath.
- Let it rest before cutting. Resting for 10–15 minutes helps the filling thicken a bit and prevents runny slices.
- If the top browns too quickly, tent the dish loosely with foil during the last 10–15 minutes of baking. This keeps it from burning while the filling bubbles.
- For cleaner slices, run a sharp, hot knife under warm water, dry it, then slice. Warming the blade helps cut through the crust without dragging.
- Make-ahead tip: assemble the dish and refrigerate for up to 24 hours before baking. Add 5–10 minutes to the bake time if baking from chilled.
Flavor Variations Cherry Dump Cake Recipe
- Mixed Berry Twist: Swap the cherry pie filling for a mixed berry filling or use a combination of blueberry and cherry. You can also use fresh berries lightly tossed with a tablespoon of sugar and 1 tablespoon of cornstarch to thicken.
- Apple-Cinnamon Dump Cake: Replace cherry filling with apple pie filling and add 1 teaspoon ground cinnamon to the cake mix for a warm, fall-flavored version. Top with chopped pecans for a cozy crunch.
- Lemon Cherry Brightness: Stir 1 teaspoon lemon zest into the cherry filling before assembling and add 1/2 teaspoon lemon zest to the melted butter for a bright, citrus lift.
- Chocolate-Cherry Indulgence: Sprinkle 1/2 cup mini chocolate chips over the cherry layer before adding the cake mix, or mix 2 tablespoons of cocoa powder into the dry cake mix for a chocolatey top. This is excellent with vanilla ice cream.
- Tropical Cherry: Stir a drained can of crushed pineapple into the cherries for a sweet-tart tropical note, then top with coconut flakes during the last 10 minutes of baking.
Serving Suggestions Cherry Dump Cake Recipe
This dessert is lovely warm, straight from the oven, but it also travels well for potlucks. Here are some serving ideas to match different moods and meals.
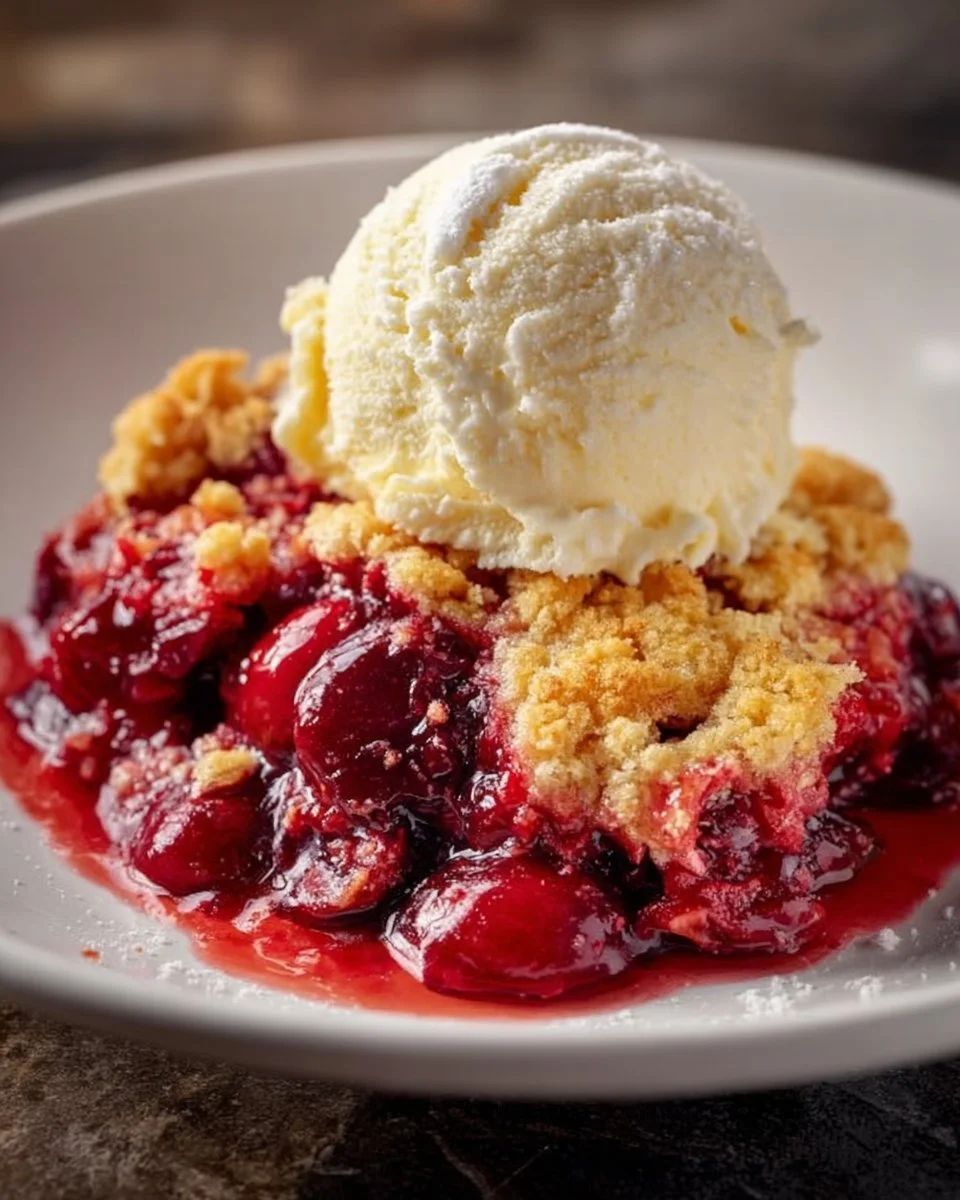
- Classic scoop: Serve warm with a scoop of vanilla ice cream. The cold creaminess pairs perfectly with the hot fruit and crisp top.
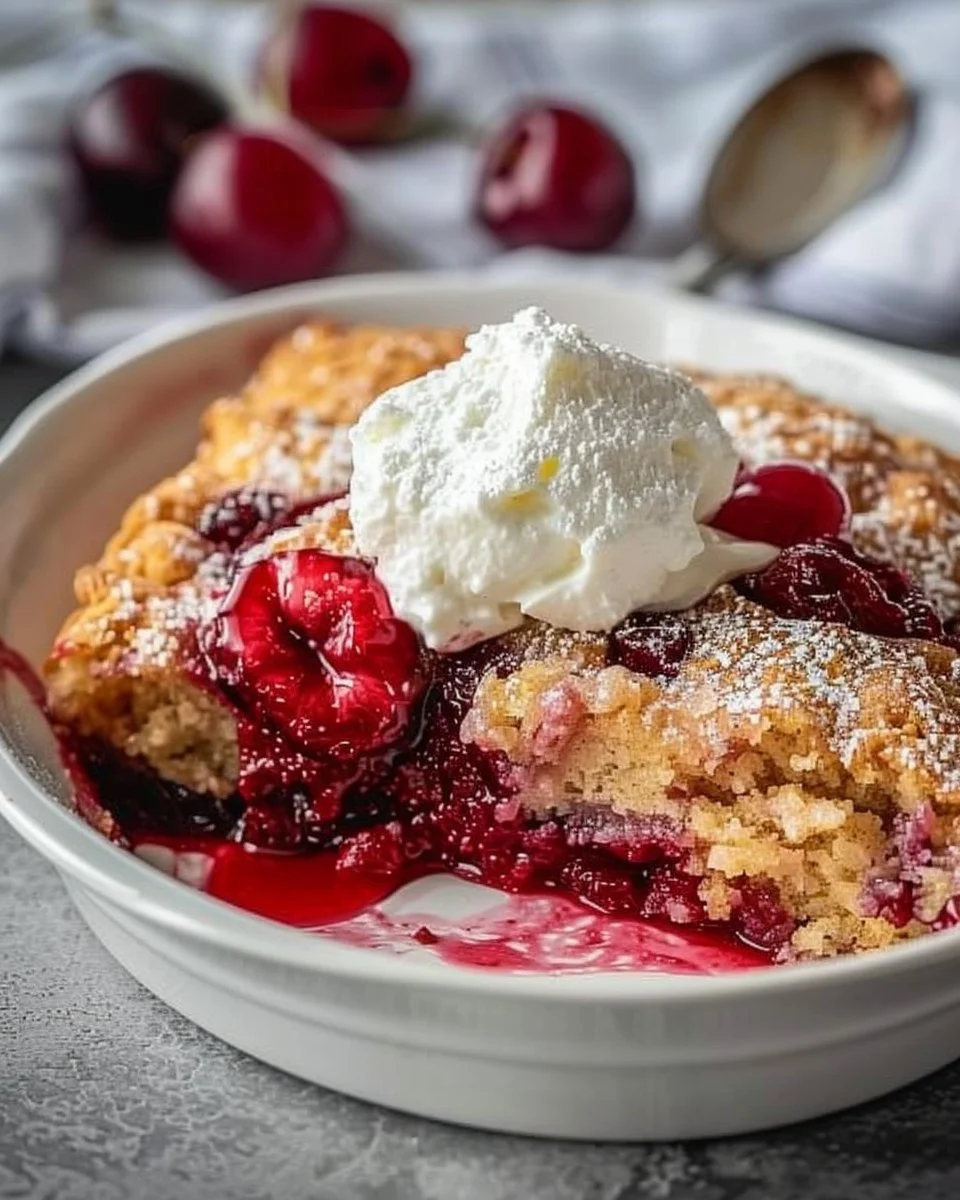
- Whipped cream: Dollop lightly sweetened whipped cream for a lighter finish than ice cream. Add a few fresh cherries on top for a pretty presentation.
- Cheese pairing: For a twist, serve small wedges of mild cream cheese on the side or a drizzle of sweetened mascarpone — it complements the cherry sweetness.
- With coffee or tea: A slice of dump cake makes a comforting companion to afternoon coffee or a black tea.
- As a potluck star: Cut into bars and bring a pan for easy serving. The hearty flavors usually disappear fast.
If you want to offer a complementary main dish with similar quick-prep convenience, consider pairing your dessert with an easy saucy entrée like an Asian glazed orange chicken recipe. Sweet-savory mains and a fruit-forward dessert create a satisfying meal without complicated timing.
Storage and Freezing Instructions Cherry Dump Cake Recipe
Storage:
- Room temperature: Covered loosely, leftover dump cake will keep at room temperature for up to 24 hours. The crust will soften over time.
- Refrigerator: Store covered in the refrigerator for up to 4 days. Refrigeration helps slow spoilage but can make the topping less crisp. Reheat individual portions in the microwave or the oven to restore warmth.
- Reheating: For best texture, reheat slices in a 325°F oven for 10–12 minutes if chilled, or warm single servings in a microwave for 20–30 seconds. A quick oven blast helps re-crisp the top.
Freezing:
- Freeze single servings: Wrap cooled slices tightly in plastic wrap and place in a labeled freezer bag. They’ll keep well for up to 3 months. Thaw overnight in the fridge, then reheat.
- Freeze whole pan: You can also freeze the entire baked cake. Wrap tightly in plastic and then foil to prevent freezer burn. Thaw overnight in the fridge and reheat at 350°F for 15–20 minutes or until warmed through. Add 5–10 minutes if still partially frozen.
Note: Texture changes are normal after freezing; the top won’t be as crisp as when freshly baked, but the flavor remains delicious.
Nutrition Facts (Per Serving)
Makes about 12 servings. Values are estimates.
- Calories: 380 kcal
- Protein: 4 g
- Carbohydrates: 52 g
- Fat: 18 g
- Fiber: 2 g
- Sodium: 280 mg
Nutrition notes:
- These values are approximate and will vary depending on brands and any ingredient swaps.
- Reducing the amount of butter or choosing a lighter pie filling will decrease calories and fat per slice.
- Using nuts increases healthy fats and a bit of protein and fiber.
FAQ About Cherry Dump Cake Recipe
How long does cherry dump cake last after baking?
Baked cherry dump cake will stay safe to eat for about 3–4 days if stored in the refrigerator. Keep it covered to prevent it from drying out or absorbing odors. If you plan to keep it longer, consider freezing single portions for up to three months.
Can I use fresh cherries instead of canned cherry pie filling?
Yes, you can use fresh cherries, but you’ll want to cook them down a bit first to release juices and thicken the mixture. Toss pitted cherries with sugar and a tablespoon of cornstarch, cook gently for a few minutes until syrupy, cool, then proceed with the recipe. Fresh cherries give a brighter, less processed flavor but need that extra step to ensure the filling isn’t too watery.
What if I don’t have yellow cake mix? Can I make one from scratch?
You can, but the convenience of the boxed mix is the point of a dump cake. A homemade substitute would require a basic dry cake batter—flour, sugar, leavening, and salt—topped by melted butter. The texture may be different because boxed mixes contain specific fat stabilizers and sweeteners, but a scratch mix can still be tasty. If you try homemade, consider adding a few tablespoons of butter into the dry mix before pouring the rest on top.
Is it possible to make this dessert gluten-free?
Yes. Use a certified gluten-free yellow cake mix of similar weight as the standard boxed mix and ensure your cherry pie filling is gluten-free (most are, but check labels). Baking times and texture may vary slightly, so watch for bubbling and a golden top.
Can I reduce the sugar in this recipe without losing texture?
You can choose a reduced-sugar or light cherry pie filling and look for a lower-sugar cake mix. Reducing sugar can change how the top browns and how the filling sets, so the simplest swap is a lighter pie filling. Another option is to use the same cake mix but reduce the amount of nuts or skip any extra sugar additions. Taste and texture will vary, but the core method still works.
Why is my dump cake soggy in the middle?
Sogginess usually happens if the filling is too watery, if too much butter soaks down without enough dry mix to absorb it, or if the cake was not baked long enough. To avoid this, ensure you use the suggested proportions, and bake until you see bubbling fruit around the edges and a nicely browned top. If your oven runs cool, you might need a few extra minutes. Also, avoid stirring the layers during assembly—that separation is intentional.
Can I make individual servings instead of a 9×13 pan?
Absolutely. Use an oven-proof muffin tin or small ramekins. Reduce baking time—start checking at 20–25 minutes for small servings—and watch for bubbling and browning. Individual servings make charming presentations and are perfect for portion control.
What toppings go well with cherry dump cake?
Classic options include vanilla ice cream, whipped cream, or a drizzle of heavy cream. For a richer finish, try a scoop of mascarpone or a dusting of powdered sugar. Fresh mint or sliced almonds add a nice touch for presentation and texture.
Final Thoughts
This Cherry Dump Cake Recipe is a go-to for busy bakers who still want a dessert that feels homemade. With minimal prep, flexible ingredient swaps, and satisfying flavor and texture, it’s ideal for family dinners, potlucks, and casual gatherings. Keep a can of cherry pie filling and a box of cake mix in your pantry—you’ll be pleasantly surprised how often this simple approach saves the day.
Whether you serve it warm with a scoop of ice cream or pack it for a picnic, this dessert is proof that uncomplicated recipes can be both comforting and crowd-pleasing. Enjoy!
Print
Cherry Dump Cake
- Total Time: 55 minutes
- Yield: 12 servings
- Diet: Vegetarian
Description
A wonderfully simple dessert that combines cherry pie filling and yellow cake mix for a warm, comforting treat.
Ingredients
- 1 can (21 oz) cherry pie filling
- 1 box (15.25 oz) yellow cake mix
- 1 cup (2 sticks) unsalted butter, melted
- ½ cup chopped walnuts or pecans (optional)
- 1 teaspoon vanilla extract (optional)
Instructions
- Preheat your oven to 350°F (175°C) and lightly grease a 9×13-inch baking dish.
- Dump the cherry pie filling into the prepared baking dish, spreading it evenly.
- Sprinkle the dry yellow cake mix evenly over the cherry layer without stirring.
- Pour melted butter evenly over the cake mix.
- Optional: Sprinkle chopped nuts on top.
- Bake for 45 to 50 minutes or until the top is golden and bubbly around the edges.
- Let it cool for 10-15 minutes before serving.
Notes
For a nut-free version, omit the walnuts or pecans and use toasted oats or extra butter. For a dairy-free or vegan option, replace the butter with melted coconut oil or vegan butter.
- Prep Time: 10 minutes
- Cook Time: 45 minutes
- Category: Dessert
- Method: Baking
- Cuisine: American