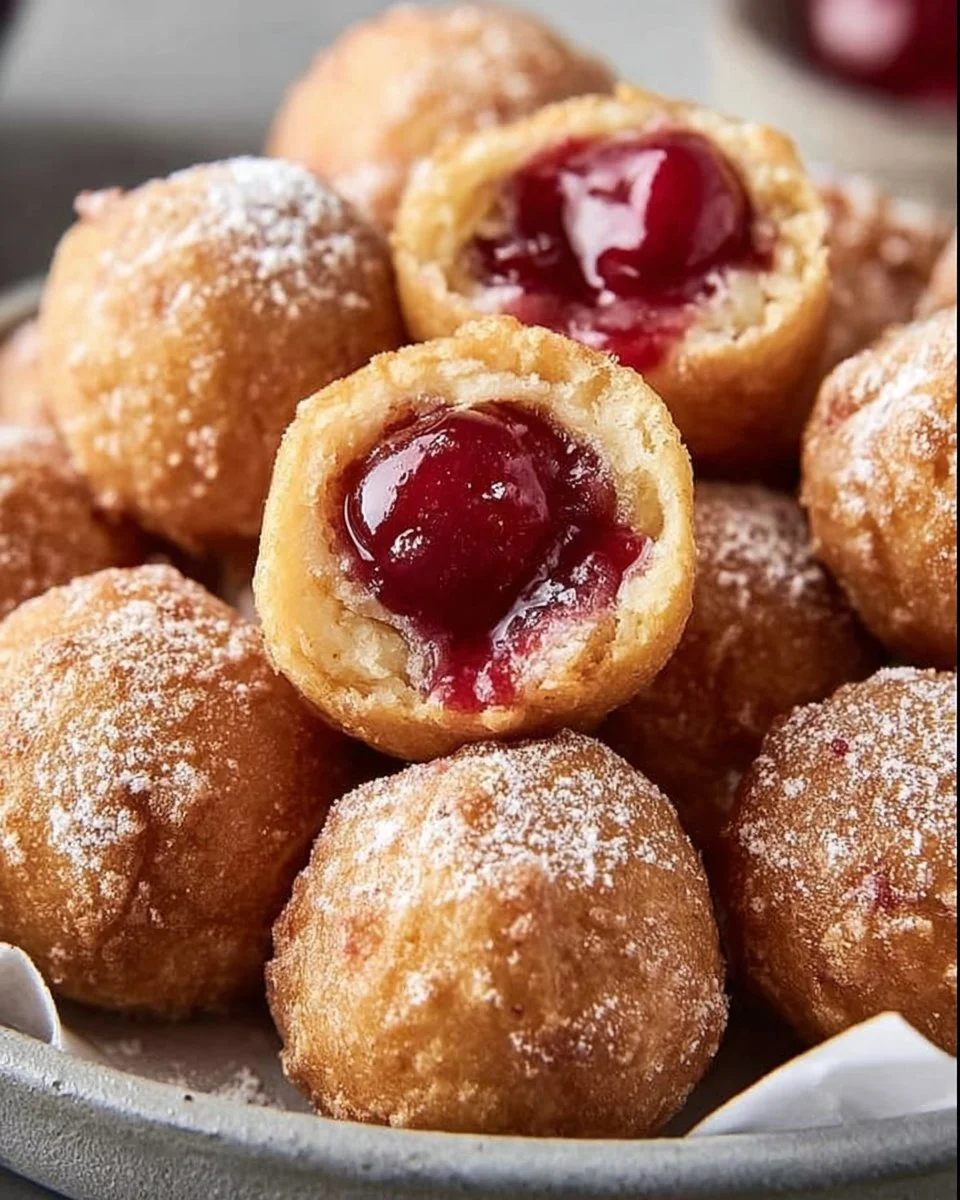
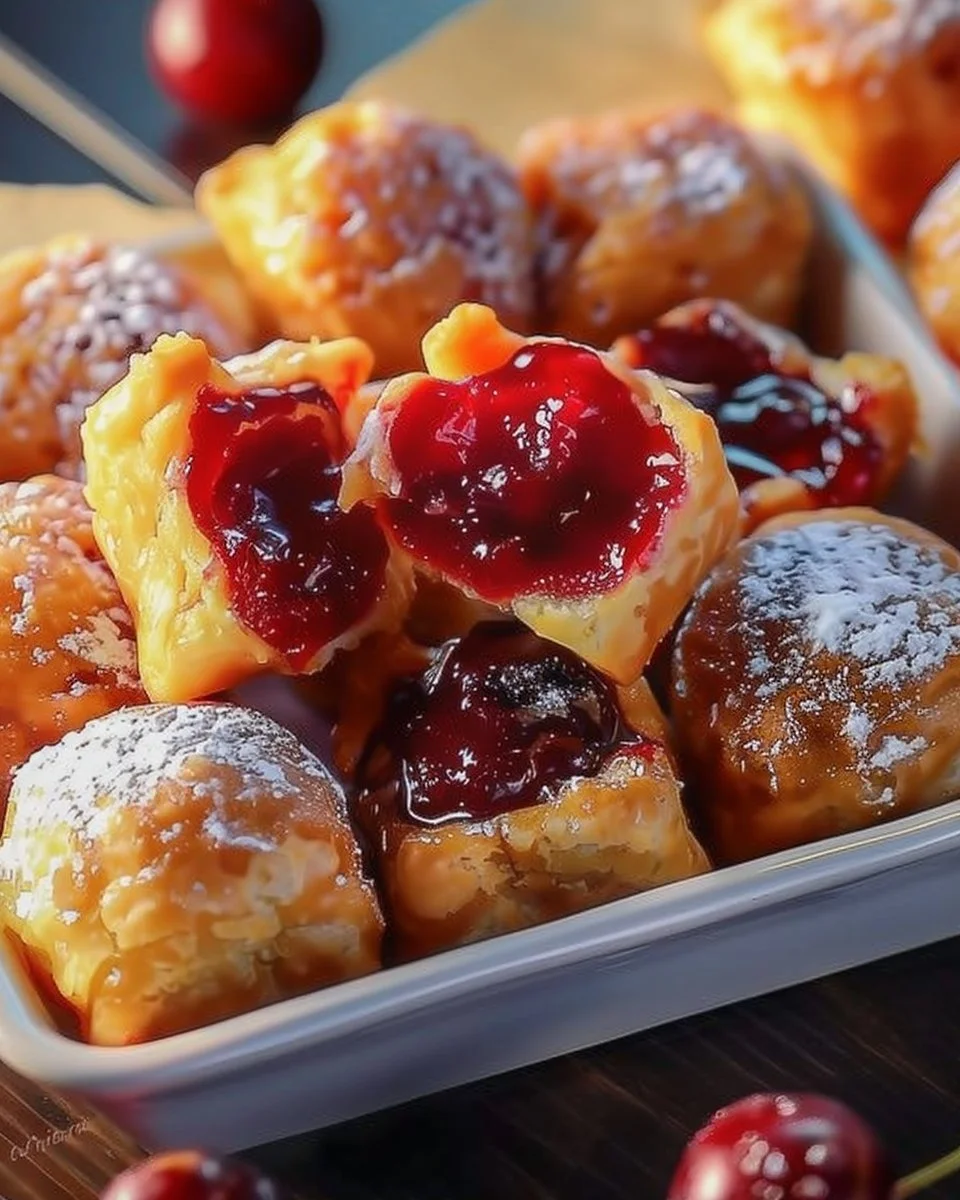
Quick Cherry Pie Bites
Quick Cherry Pie Bites are a delightful, hand-held dessert that comes together in minutes and delivers the classic cherry pie flavor in every bite. If you love small, shareable treats and easy baking projects, this recipe is perfect for busy weeknights, potlucks, or sweet snacks, and if you enjoy bite-sized recipes you might also appreciate the easy honey garlic chicken bites for savory inspiration. These little pockets of fruit-filled pastry are forgiving, portable, and endlessly adaptable, which makes them an excellent choice whether you’re a baking beginner or an experienced home cook looking for a quick crowd-pleaser.
Bite-sized desserts like these are great because they require minimal equipment, use pantry-friendly ingredients, and are easy to scale up or down. The end result is golden, flaky pastry with a sweet cherry center — the kind of comfort food that sparks nostalgia but still feels modern and convenient.
This article walks you through why you’ll want to make Quick Cherry Pie Bites, clear step-by-step guidance on how to assemble them, helpful tips for consistent results, flavor ideas to customize the recipe, serving suggestions, safe storage methods, nutrition estimates, and a brief FAQ to answer common questions. Read on to discover how to make a simple recipe into a dessert you’ll return to all season long.
why make this recipe
There are several reasons to make Quick Cherry Pie Bites right away. First, they transform a familiar flavor — cherry pie — into a perfectly portioned treat that’s easier to serve and eat. No slicing, no forks: guests can grab a bite and keep mingling. Second, this recipe is fast. Using pre-made pie crusts and canned cherry pie filling cuts the hands-on time dramatically, which is ideal when you want dessert without a long bake day.
Third, they’re versatile. You can tailor the sweetness, add a spice or two, or swap fillings to suit the season or dietary needs. They’re just as welcome at a casual backyard barbecue as they are on a holiday dessert tray. Finally, they’re approachable. The technique to fold and seal these little pockets is simple, so bakers at any level can achieve a neat result without advanced pastry skills.
Beyond convenience and flavor, Quick Cherry Pie Bites make an economical dessert. The ingredients are affordable and common, and you can stretch a single package of pie crusts into multiple servings. They’re also great for meal prep-style dessert planning: make a batch in the afternoon and enjoy warm bites later, or freeze for future cravings.
how to make Quick Cherry Pie Bites
This section explains the process in a friendly, step-by-step way. Keep your workspace tidy and preheat the oven first for the smoothest run. Use a rolling pin if the crusts are a little thick from refrigeration, and have a fork or pastry brush handy to seal and finish each pocket.

Ingredients :
1 cup cherry pie filling, 1 package of pre-made pie crusts, 1 egg (for egg wash), Sugar (for sprinkling), Optional: whipped cream or vanilla ice cream for serving
Ingredient notes:
- The recipe calls for one cup of cherry pie filling; canned or jarred pie filling is fine and keeps prep fast. If you prefer a fresher option, see the FAQ below about using fresh cherries.
- A package of pre-made pie crusts usually contains two rounds; this recipe uses those crusts cut into small squares or circles. If your crust is brittle from the fridge, let it sit at room temperature for a few minutes before rolling.
- The egg wash (one beaten egg) gives a glossy, golden finish. For an egg-free version, brush with a little milk or light cream instead.
- Sugar for sprinkling is optional but adds a pleasant crunch and sparkle to the tops.
- Optional toppings such as whipped cream or vanilla ice cream make these bites extra indulgent when serving.
Directions :
- Preheat the oven to 375°F (190°C).
- Roll out the pie crust and cut into small squares or circles.
- Place a small spoonful of cherry pie filling in the center of each square.
- Fold the edges over the filling to create a pocket and seal them well.
- Brush the tops with beaten egg and sprinkle with sugar.
- Place on a baking sheet lined with parchment paper.
- Bake for 15-20 minutes or until golden brown.
- Serve warm, optionally with whipped cream or ice cream.
Pro Tips for Success Quick Cherry Pie Bites
- Keep everything cool until you’re ready to assemble. Slightly chilled pie crusts handle better and produce flakier results; warm dough becomes sticky and harder to manage. If the dough gets too soft while you work, pop the tray in the fridge for five to ten minutes.
- Don’t overfill. A small spoonful of filling is enough. Overfilling makes sealing difficult and increases the risk of leaks during baking that can burn and create sticky messes.
- Seal edges securely. Use the tines of a fork to crimp the edges tightly, or fold a small flange of dough over and press to create a strong seal. If needed, dab the edges with a bit of beaten egg to act as glue.
- Vent the tops. If you’re folding a pocket rather than fully enclosing it, cut a tiny slit in the top to let steam escape. This prevents sogginess and helps the crust brown evenly.
- Watch the oven in the final minutes. Small bites bake quickly and the difference between golden and overbrowned can be just a minute or two. Rotate the baking sheet halfway through for even coloring.
- Use parchment paper or a silicone baking mat to make cleanup easier and reduce the chances of sticking or melted filling burning on the sheet.
Flavor Variations Quick Cherry Pie Bites
- Almond Cherry: Add a sprinkle of finely chopped almonds or a touch of almond extract to the cherry filling before baking for a nutty, aromatic twist. Almond and cherry are classic partners and the extract will make the fruit flavor pop.
- Citrus Zest: Stir a little lemon or orange zest into the cherry filling for a bright, fresh edge. Citrusy notes cut the sweetness and add complexity without changing the basic method.
- Cheesecake Cherry: Place a small dab of sweetened cream cheese (about a teaspoon) between the crust and the cherry filling before sealing to create a cheesecake-like center. The tang balances the cherries and provides a creamy contrast.
- Spiced Cherry: Mix a pinch of ground cinnamon or a dash of allspice into the filling to evoke the flavors of classic cherry pie. This is especially nice during cooler months when warm spices feel comforting.
- Mixed Berry: Replace or combine cherry filling with other fruit preserves such as blueberry, strawberry, or mixed berry for a colorful variety platter. This is a good approach if you’re serving a crowd with different flavor preferences.
Serving Suggestions Quick Cherry Pie Bites
Serve these bites warm from the oven for the best texture and flavor contrast. A scoop of vanilla ice cream or a dollop of freshly whipped cream pairs beautifully with the tart-sweet cherries and buttery crust. For a party, arrange the bites on a platter with a small bowl of whipped cream or mascarpone for guests to add as they like.
For a brunch or tea setting, present them alongside freshly brewed coffee or fragrant black tea; the warm fruit pastry works well with both hot and cold beverages. For a festive touch, dust the tops with a light sprinkle of powdered sugar right before serving, or drizzle a little warmed cherry syrup over the bites for an extra pop.
If you’re serving at an outdoor event, keep a small insulated container of ice cream or whipped topping with bowls so guests can add chilled accompaniments without melting all over the place. You can also serve these with plain Greek yogurt sweetened lightly with honey for a lower-sugar contrast that still feels creamy and special.
Finally, consider a dessert board with a variety of mini bites: include a few Quick Cherry Pie Bites, several savory finger foods, and a selection of cheeses for a balanced mix that appeals to different palates.
Storage and Freezing Instructions Quick Cherry Pie Bites
Short-term storage: Let the bites cool to room temperature, then transfer them to an airtight container. They’ll keep at room temperature for up to 1 day without refrigeration. If you prefer to refrigerate, they’ll maintain the best quality for 2–3 days. Reheat in a 350°F (175°C) oven for 5–8 minutes to revive flakiness and warm the filling.
Freezing for longer storage: Flash-freeze baked bites on a baking sheet for 1–2 hours until firm, then transfer to a freezer-safe bag or airtight container. Separating layers with parchment or wax paper prevents sticking. Frozen baked bites will keep for up to 2 months. To reheat, bake from frozen at 350°F (175°C) for 10–15 minutes, or until heated through and crisp. If reheating from thawed, heat for 8–10 minutes.
Freezing unbaked: You can also freeze assembled, unbaked pockets. Arrange them on a baking sheet and freeze until solid, then store in a sealed bag for up to 2 months. When ready to bake, add a couple of extra minutes to the baking time and brush with egg wash before baking.
Avoid soggy results: If you plan to store leftovers, reheat in an oven or toaster oven rather than a microwave. Microwaving will soften the crust and reduce crispness.
Nutrition Facts (Per Serving) — Approximate
- Serving size: 1 pie bite (estimate; yields vary based on how many bites you cut from the crusts)
- Calories: 160 kcal
- Protein: 2 g
- Carbohydrates: 22 g
- Fat: 7 g
- Fiber: 1 g
- Sodium: 140 mg
Note: These nutrition values are approximate and will vary depending on the exact pie crust brand, the amount of filling per bite, and whether you add toppings like whipped cream or ice cream. If you need precise nutrition data for dietary or allergen concerns, consider using a nutrition calculator with the specific brands and measurements you use.
FAQ About Quick Cherry Pie Bites
Can I use fresh cherries instead of canned pie filling?
Yes, you can use fresh cherries, but you’ll need to cook them down into a thickened filling so they won’t release too much liquid in the pastry. Pit and halve the cherries, then simmer with a little sugar and cornstarch (or flour) until thick and jammy. Allow the mixture to cool completely before spooning into the crusts. Fresh cherry filling gives a brighter flavor and lets you control the sweetness, but it requires extra time for simmering and cooling.
How many bites does this recipe make?
The number of bites depends on the size you cut from each pie crust. Typically, one standard package of pre-made pie crusts (two crusts) yields about 12–16 small bites when cut into 2.5–3 inch squares or circles. If you make them larger, expect fewer servings; if you cut smaller, you can stretch the batch. Adjust portions based on your event size and appetite of your guests.
Can I make these ahead for a party?
Yes. You can bake the bites earlier in the day and reheat them briefly before serving to bring back crispness. Alternatively, assemble them and store them uncovered on a tray in the refrigerator for a few hours before baking. For longer advance prep, freeze assembled unbaked bites on a sheet and store them in an airtight container; bake from frozen when needed, adding a few extra minutes to the baking time.
What if my crust is soggy after baking?
Soggy crusts usually result from excess moisture in the filling or insufficient venting during baking. Use a slightly smaller spoonful of filling and cut a small vent or slit in the top of each pocket to allow steam to escape. Pre-baking the bottom crusts for a couple of minutes (blind baking briefly) is another technique for very moist fillings, though it’s not usually necessary for handheld bites. Reheating in a hot oven instead of a microwave will help the crust crisp up.
Can I freeze these with a topping like whipped cream or ice cream?
Do not freeze whipped cream or ice cream on the bites. If you plan to freeze baked or unbaked bites, store them plain and add toppings at serving time. Whipped cream and ice cream should be added right before eating to preserve texture and flavor. If you need a make-ahead presentation, pipe stabilized whipped cream (made with a bit of cream cheese or gelatin) shortly before serving — but still refrigerate rather than freeze the finished plated dessert.
Are there vegan or gluten-free substitutions that work?
Yes. For a vegan version, use plant-based pie crusts and replace the egg wash with a plant milk (such as almond or oat milk) mixed with a touch of maple syrup for color. For gluten-free, use pre-made gluten-free pie crusts or make your own with gluten-free flour blends; be aware that texture will differ from traditional crusts. Also check that the pie filling is gluten-free, as some brands use thickeners or additives. These substitutions are straightforward but may affect how the crust browns and crisps, so keep an eye on baking times.
Final Thoughts
Quick Cherry Pie Bites are a simple, satisfying way to enjoy pie flavor without the fuss of a whole pie. With a few pantry staples and minimal prep, you get portable, crowd-friendly treats that can be customized for seasons, celebrations, and dietary preferences. Whether you’re serving them warm with a scoop of vanilla ice cream or packing them for a picnic, these handheld pies deliver on both comfort and convenience. Try the variations and tips in this guide to make the recipe your own, and remember that small adjustments — a pinch of spice, a different topping, or a change in shape — can keep this recipe feeling new each time.
If you’re experimenting with other handheld recipes, you may find additional inspiration from a savory twist like the delicious Irish potato pie, which showcases how versatile small-format pies can be in both sweet and savory directions. Enjoy baking, and savor every bite.
Print
Quick Cherry Pie Bites
- Total Time: 30 minutes
- Yield: 12-16 bite-sized pies
- Diet: Vegetarian
Description
Delightful, hand-held dessert delivering classic cherry pie flavor in every bite. Perfect for busy weeknights or gatherings.
Ingredients
- 1 cup cherry pie filling
- 1 package of pre-made pie crusts
- 1 egg (for egg wash)
- Sugar (for sprinkling)
- Optional: whipped cream or vanilla ice cream for serving
Instructions
- Preheat the oven to 375°F (190°C).
- Roll out the pie crust and cut into small squares or circles.
- Place a small spoonful of cherry pie filling in the center of each square.
- Fold the edges over the filling to create a pocket and seal them well.
- Brush the tops with beaten egg and sprinkle with sugar.
- Place on a baking sheet lined with parchment paper.
- Bake for 15-20 minutes or until golden brown.
- Serve warm, optionally with whipped cream or ice cream.
Notes
Keep everything cool until ready to assemble for flakier results. Overfilling can cause leaks during baking; use small spoonfuls of filling.
- Prep Time: 10 minutes
- Cook Time: 20 minutes
- Category: Dessert
- Method: Baking
- Cuisine: American