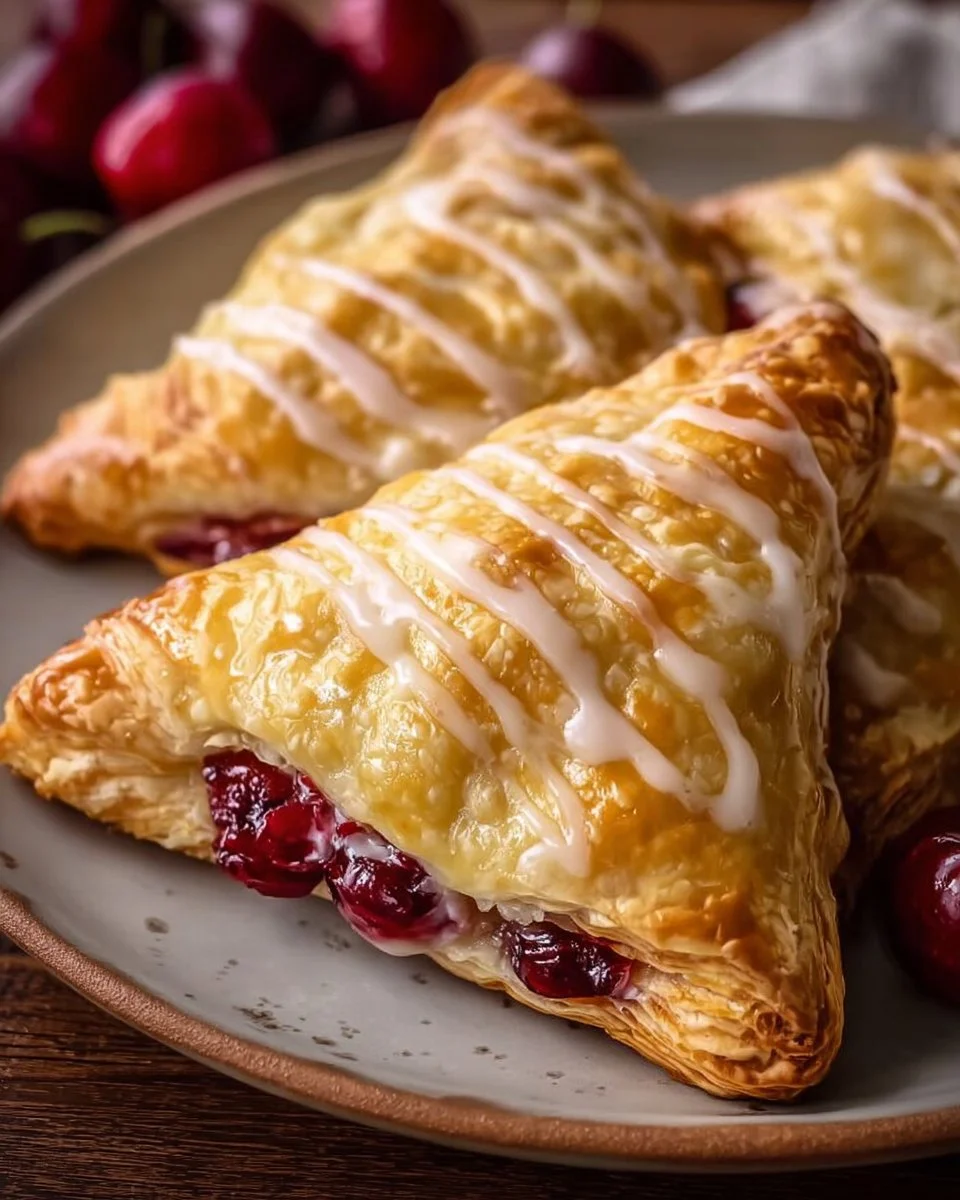

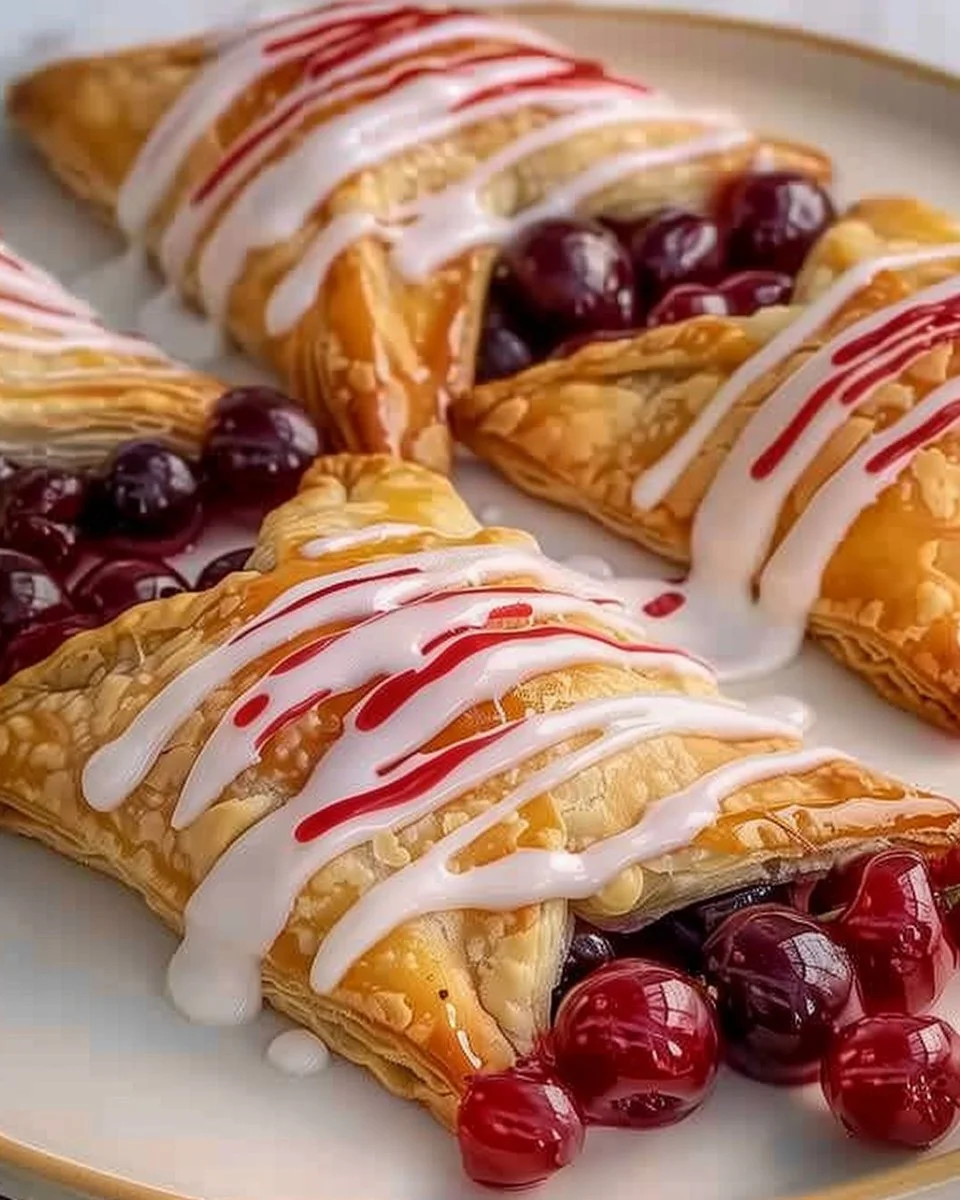
Homemade Cherry Turnovers are a delightful treat that can brighten up any day. With their flaky pastry encasing sweet, juicy cherries, these turnovers are not just a dessert; they are a perfect snack or breakfast option. Let’s dive into why you should make this recipe and how you can do it easily at home.
Why Make This Recipe
Making Homemade Cherry Turnovers gives you a chance to enjoy a delicious treat filled with natural fruit flavors. Whether you have fresh cherries from the farmer’s market or are using frozen ones, this recipe allows you to take advantage of what’s in season or what you already have on hand. The process of creating the turnovers is straightforward and fun, making it an excellent activity for friends or family. Plus, the aroma that fills your kitchen while baking is simply irresistible!
How to Make Homemade Cherry Turnovers
Creating your own cherry turnovers is a rewarding experience. Follow these steps, and you’ll have a batch of golden-brown pastries that taste like they came from a bakery. The combination of fresh dough and sweet cherry filling will make this recipe a favorite in your household.
Ingredients
To make these tasty turnovers, gather the following ingredients:
- 2 cups all-purpose flour
- 1/4 teaspoon salt
- 1 cup unsalted butter, chilled and diced
- 1/4 cup ice water
- 2 cups fresh or frozen cherries, pitted
- 3/4 cup sugar
- 1 tablespoon cornstarch
- 1 teaspoon vanilla extract
- 1 egg, beaten (for egg wash)
- Powdered sugar (for dusting)
Directions
- Preheat the oven to 400°F (200°C).
- In a bowl, mix the flour and salt together. Cut in the chilled, diced butter until the mixture resembles coarse crumbs.
- Stir in the ice water until you can form a ball with the dough. Wrap it in plastic wrap and refrigerate for at least 4 hours or overnight.
- In a saucepan, combine the cherries, sugar, cornstarch, and vanilla extract over medium heat. Cook the mixture until it becomes bubbling and thickened. Once complete, allow to cool.
- On a floured surface, roll out the chilled dough to about 1/8-inch thick. Cut this into squares.
- Place a spoonful of the cherry filling in the center of each square, fold it over, and seal the edges well.
- Brush the tops with the beaten egg wash and place them onto a baking sheet.
- Bake in the preheated oven for 20-25 minutes or until golden brown.
- Once cool, dust with powdered sugar before serving.
Pro Tips for Success with Homemade Cherry Turnovers
- Chill Your Dough: Make sure to chill the dough adequately. This helps with achieving a flaky texture.
- Don’t Overfill: Be careful not to overfill the turnovers with the cherry mixture, as this can cause spillage during baking.
- Seal Well: Proper sealing of the edges will prevent the filling from leaking out while the pastries bake.
- Experiment with Fillings: Try different fruit fillings or even a combination of fruits for varied flavors.
- Serve Warm: These turnovers taste best when served warm right from the oven.
- Use a Fork for Edges: To ensure a tight seal, use a fork to crimp the edges of the turnovers.
Flavor Variations for Homemade Cherry Turnovers
- Mixed Berry Filling: Combine cherries with blueberries or raspberries for an exciting mixed berry turnover.
- Chocolate Cherry: Add a few chocolate chips to the cherry filling for a decadent twist.
- Almond Extract: Substitute vanilla extract with almond extract for a pleasing nutty flavor.
- Lemon Zest: Add some lemon zest to the filling for a refreshing zing that complements the cherries.
- Nutty Twist: Incorporate chopped nuts, such as almonds or walnuts, into your filling for added texture.
Serving Suggestions for Homemade Cherry Turnovers
Homemade Cherry Turnovers are delightful on their own but pair beautifully with various accompaniments. Here are some suggestions to serve them with:
- Vanilla Ice Cream: A scoop of vanilla ice cream on the side can turn your turnovers into a delightful dessert.
- Fresh Whipped Cream: Lightly sweetened whipped cream adds a delightful creaminess that complements the cherries beautifully.
- Coffee or Tea: These pastries also make a nice pairing with a warm cup of coffee or tea during breakfast or afternoon snack time.
- Serve with Yogurt: A dollop of yogurt can give a bit of tanginess that balances the sweetness of the cherries.
Storage and Freezing Instructions for Homemade Cherry Turnovers
If you have leftover turnovers (if you can resist eating them all!), here’s how to store them properly:
- Room Temperature: Allow the turnovers to cool completely before storing them in an airtight container at room temperature for up to 2 days.
- Refrigeration: If you prefer to keep them longer, place the container in the fridge, which can extend their freshness for up to a week.
- Freezing: To freeze, wrap each turnover individually in plastic wrap or aluminum foil and place them in a freezer bag. They can be kept in the freezer for up to 3 months. When ready to enjoy, bake from frozen, adding a few extra minutes to the baking time.
Nutrition Facts (Per Serving)
- Calories: 240
- Protein: 2g
- Carbohydrates: 30g
- Fat: 12g
- Fiber: 1g
- Sodium: 70mg
FAQ About Homemade Cherry Turnovers
Can I use frozen cherries instead of fresh?
Yes, you can use frozen cherries for this recipe! Just be sure to thaw and drain any excess liquid before using them in the filling. This will help prevent the turnovers from becoming soggy.
How can I ensure my pastries are flaky?
To achieve flaky pastries, ensure that your butter is cold and work quickly to keep it from warming up while mixing. Chilling your dough before rolling it out also enhances the flakiness.
How do I know when my turnovers are done baking?
Your Cherry Turnovers are ready when the tops are golden brown and the edges feel firm to the touch. Keep an eye on them towards the end of the baking time to prevent over-browning.
Can I make the dough ahead of time?
Absolutely! The dough can be made and stored in the refrigerator for up to 2 days before using. Alternatively, you can freeze the dough for up to 3 months.
What can I do with leftover cherry filling?
If you have leftover filling, it can be used in other recipes. Consider adding it to yogurt, spreading it on toast, or using it as a topping for pancakes or waffles.
Final Thoughts
Making Homemade Cherry Turnovers is a rewarding and delightful experience that is sure to impress your family and friends. The combination of flaky crust and sweet cherry filling creates a treat that is hard to resist. Whether you’re enjoying them warm or save them for a later indulgence, they are bound to bring joy to your table. So gather your ingredients and get started on this delicious pastry adventure!
Enjoy baking!
Print
Homemade Cherry Turnovers
- Total Time: 265 minutes
- Yield: 12 servings
- Diet: Vegetarian
Description
Delightful pastries with flaky pastry encasing sweet, juicy cherries, perfect as a dessert, snack, or breakfast option.
Ingredients
- 2 cups all-purpose flour
- 1/4 teaspoon salt
- 1 cup unsalted butter, chilled and diced
- 1/4 cup ice water
- 2 cups fresh or frozen cherries, pitted
- 3/4 cup sugar
- 1 tablespoon cornstarch
- 1 teaspoon vanilla extract
- 1 egg, beaten (for egg wash)
- Powdered sugar (for dusting)
Instructions
- Preheat the oven to 400°F (200°C).
- Mix the flour and salt together. Cut in the chilled, diced butter until the mixture resembles coarse crumbs.
- Stir in the ice water until you can form a ball with the dough. Wrap it in plastic wrap and refrigerate for at least 4 hours or overnight.
- Combine the cherries, sugar, cornstarch, and vanilla extract over medium heat in a saucepan. Cook until bubbling and thickened, then allow to cool.
- Roll out the chilled dough on a floured surface to about 1/8-inch thick and cut into squares.
- Place a spoonful of cherry filling in the center of each square, fold, and seal the edges well.
- Brush the tops with beaten egg wash and place on a baking sheet.
- Bake for 20-25 minutes or until golden brown.
- Dust with powdered sugar before serving.
Notes
Chill the dough well for a flaky texture. Don’t overfill the turnovers to prevent spillage.
- Prep Time: 240 minutes
- Cook Time: 25 minutes
- Category: Dessert
- Method: Baking
- Cuisine: American