Irresistible Garlic Parmesan Cheeseburger Bombs for Game Day
When it comes to game day, nothing excites the crowd like Irresistible Garlic Parmesan Cheeseburger Bombs. These delicious, cheesy bites are the perfect blend of flavors and textures, guaranteed to bowl over your guests. Whether you’re tailgating with friends or enjoying a cozy day at home, this recipe is a must-have on your game day menu.
Why Make This Recipe
The undeniable allure of cheeseburger bombs lies in their versatility and finger-food appeal. They pack a hearty punch of flavor in each bite, combining the classic taste of a cheeseburger with the comfort of warm, fresh dough. These bombs cater to both meat lovers and cheese enthusiasts—making them a crowd favorite. Not only are they easy to prepare, but they also allow for customization based on personal preferences or dietary needs. Plus, who wouldn’t want to impress their friends with a delicious homemade snack while they cheer for their favorite team?
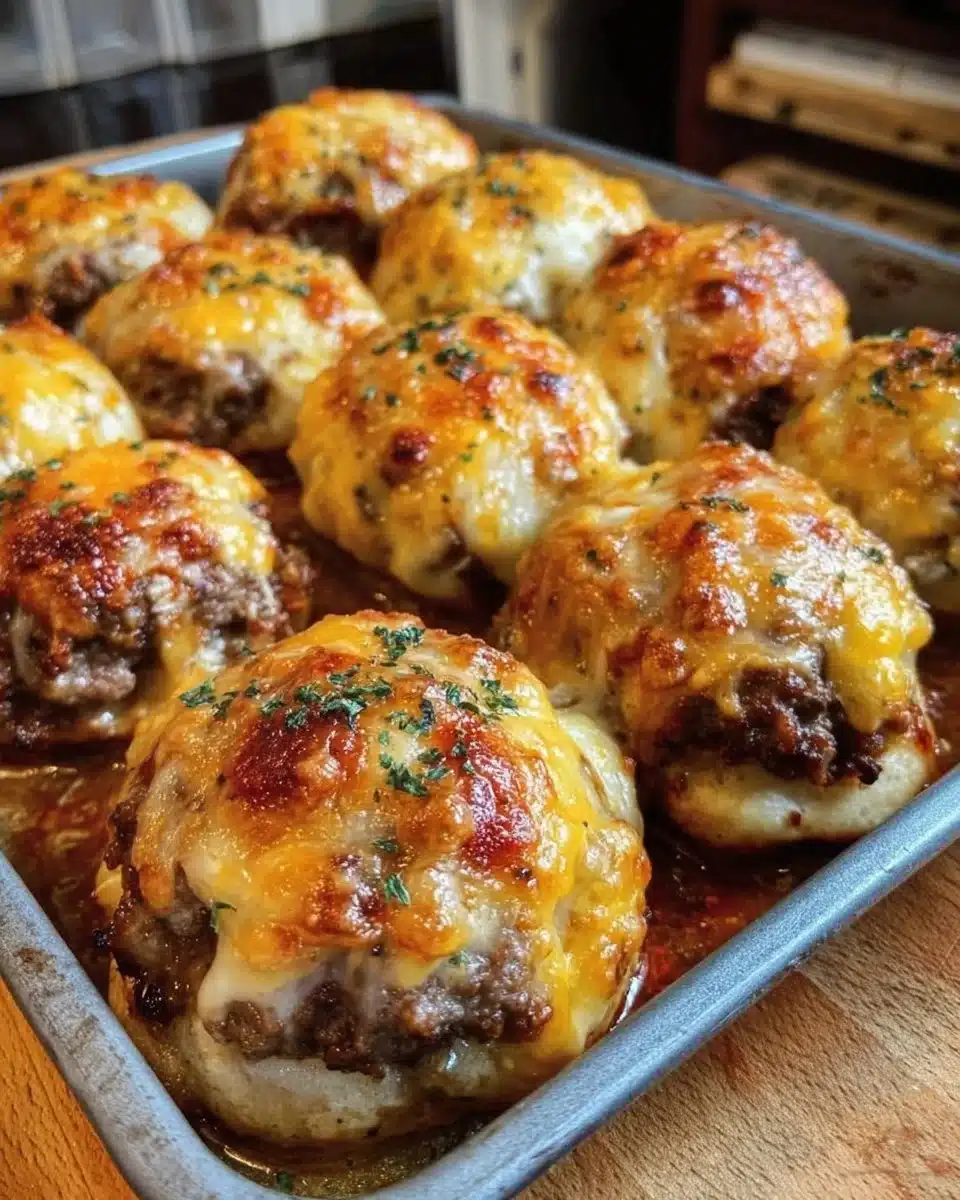
How to Make Irresistible Garlic Parmesan Cheeseburger Bombs
Creating these cheeseburger bombs is straightforward and fun! You’ll enjoy the process as much as the finished product. Follow these simple steps to make your very own Garlic Parmesan Cheeseburger Bombs.
{image_template}
Ingredients
- 1 package pizza dough (store-bought or homemade)
- 1/2 pound ground beef (or ground turkey)
- 1 cup shredded cheddar cheese
- 2 cloves garlic (minced)
- 1/4 cup Parmesan cheese (grated)
- 1 tsp salt
- 1/2 tsp black pepper
Directions
- Preheat the oven to 375°F (190°C).
- In a skillet, cook the ground beef with minced garlic, salt, and pepper until browned. This step will allow the garlic to infuse its flavor into the meat.
- Mix in the Parmesan cheese and shredded cheddar cheese until well combined. The cheesy mixture will be the star filling in your bombs!
- Roll out the pizza dough on a lightly floured surface and cut it into squares (approximately 3×3 inches).
- Place a spoonful of the meat and cheese filling in the center of each square. Don’t overfill, or the bombs may burst open while baking.
- Fold the dough over the filling and seal the edges securely. Make sure to press down firmly to prevent any filling from escaping during baking.
- Arrange the bombs on a baking sheet lined with parchment paper or greased lightly.
- Bake for 20 minutes or until golden brown. The delicious aroma will fill your kitchen, making it hard to wait!
- Serve your warm cheeseburger bombs right away, possibly with your favorite dipping sauce.

Pro Tips for Success with Garlic Parmesan Cheeseburger Bombs
- Seal Well: Make sure to seal the dough edges tightly; this helps keep the filling contained.
- Don’t Skip the Garlic: Minced garlic is essential for that robust flavor. Feel free to add more if you’re a garlic fan!
- Let the Dough Rest: If you’re using homemade pizza dough, let it rest for at least 30 minutes to make it easier to handle.
- Experiment With Fillings: These bombs can be filled with various ingredients like sautéed onions, jalapeños, or even a dab of BBQ sauce for added flavor.
- Brush with Butter: For an extra golden finish, brush the tops of the bombs with melted butter just before baking.
Flavor Variations for Garlic Parmesan Cheeseburger Bombs
- Bacon Cheeseburger Bombs: Add crumbled cooked bacon to elevate the flavor and add a crunchy texture.
- Spicy Jalapeño Cheeseburgers: Incorporate diced jalapeños into the filling for a spicy kick.
- Vegetarian Option: Substitute the meat with a mixture of sautéed mushrooms and spinach for a veggie-friendly version.
- BBQ Chicken Bombs: Use shredded cooked chicken with BBQ sauce and cheese for a barbecue flair.
- Buffalo Style: Mix in some buffalo sauce with the ground beef and add blue cheese for a zesty twist.
Serving Suggestions for Garlic Parmesan Cheeseburger Bombs
These cheeseburger bombs are delightful on their own, but you can elevate the experience further by serving them with:
- Creamy ranch dipping sauce
- Ketchup or mustard on the side
- Sweet chili sauce for a spicy-sweet pairing
- Fresh vegetable sticks for a refreshing crunch alongside the bombs
Storage and Freezing Instructions for Garlic Parmesan Cheeseburger Bombs
To store any leftover bombs, follow these steps:
- Refrigerate: Keep the cooled bombs in an airtight container in the refrigerator for up to 3 days.
- Freeze: For longer storage, freeze unbaked bombs. Arrange them on a baking sheet to freeze individually before transferring to a zip-lock freezer bag. These can be kept for up to 3 months.
- When ready to eat, bake directly from frozen for an extra 5-10 minutes, or until heated thoroughly.
Nutrition Facts (Per Serving)
| Nutrients | Amount |
|————-|———-|
| Calories | 250 |
| Protein | 15g |
| Carbohydrates | 20g |
| Fat | 12g |
| Fiber | 1g |
| Sodium | 300mg |
FAQ About Irresistible Garlic Parmesan Cheeseburger Bombs
Can I use a different type of meat?
Absolutely! Ground turkey, chicken, or even plant-based meats can be substituted for ground beef. Just adjust the cooking time as necessary based on the meat you choose, ensuring it reaches the appropriate internal temperature.
Can I use homemade pizza dough?
Yes! Homemade dough can add a special touch to your bombs. If you’re going this route, be sure to let it rest properly before rolling it out.
What’s the best way to serve these bombs at a gathering?
For a fun presentation, serve them on a large platter with a selection of dipping sauces in small bowls. You can even label the flavors if you have multiple varieties of bombs!
Can I prepare these in advance?
Yes, you can prepare the bombs ahead of time and keep them in the fridge before baking. Just remember to add a little baking time if they’re chilled when you put them in the oven.
Are there any allergen concerns I should know about?
Depending on the ingredients used, there could be common allergens such as dairy or gluten. Make sure to check labels and consider alternatives for those with allergies, such as gluten-free pizza dough and dairy-free cheeses.
Final Thoughts
Irresistible Garlic Parmesan Cheeseburger Bombs are the ultimate game day snack that is sure to please everyone in attendance. With simple ingredients and straightforward instructions, you can whip up these delicious bites in no time. Plus, the versatility of this recipe allows you to get creative with flavors and fillings. Whether enjoyed at a party or as a cozy family meal, these cheeseburger bombs are sure to become a favorite in your recipe rotation. Happy cooking!
Print
Irresistible Garlic Parmesan Cheeseburger Bombs
- Total Time: 35 minutes
- Yield: 8 servings
- Diet: Non-Vegetarian
Description
Delicious, cheesy bites that combine the classic taste of a cheeseburger with warm, fresh dough, perfect for game day.
Ingredients
- 1 package pizza dough (store-bought or homemade)
- 1/2 pound ground beef (or ground turkey)
- 1 cup shredded cheddar cheese
- 2 cloves garlic (minced)
- 1/4 cup Parmesan cheese (grated)
- 1 tsp salt
- 1/2 tsp black pepper
Instructions
- Preheat the oven to 375°F (190°C).
- In a skillet, cook the ground beef with minced garlic, salt, and pepper until browned.
- Mix in the Parmesan cheese and shredded cheddar cheese until well combined.
- Roll out the pizza dough on a lightly floured surface and cut it into squares (approximately 3×3 inches).
- Place a spoonful of the meat and cheese filling in the center of each square.
- Fold the dough over the filling and seal the edges securely.
- Arrange the bombs on a baking sheet lined with parchment paper or greased lightly.
- Bake for 20 minutes or until golden brown.
- Serve warm with your favorite dipping sauce.
Notes
Make sure to seal the dough edges tightly and consider brushing the tops with melted butter for a golden finish.
- Prep Time: 15 minutes
- Cook Time: 20 minutes
- Category: Snack
- Method: Baking
- Cuisine: American